If your camp store sells enamel pins, canvas totes, or firewood bundles, you need a typeface that looks like it belongs on a trail marker, not a corporate spreadsheet. A hand-drawn forest aesthetic font for campsite merchandise gives your products the worn, organic feel that outdoor buyers actually trust. It skips the polished edges and leans into natural irregularities.
What makes this style work for outdoor gear?
These typefaces are built with uneven baselines, slightly rough terminals, and proportions that mimic carved wood or stamped metal. They fit best when your design needs to feel grounded and approachable. Clean sans-serifs often look too sterile on recycled tags or waxed canvas, while organic letterforms blend with the material instead of fighting it.
How do I match the font to my specific products?
Start by looking at your print method and base material. Heavy cotton shirts and canvas totes handle thicker stroke weights well, while embroidered patches require simplified counters and open apertures to prevent thread bunching. If your brand leans toward quiet backcountry trips, choose a narrower, understated cut. For family-friendly campground stores, a slightly rounder sketch style reads better on stickers and metal signs.
You can also adjust the overall vibe by pairing it with the right supporting type. When you need clear wayfinding details, a wilderness-inspired typeface built for trail maps keeps directions readable without breaking the theme. For small care instructions on reusable gear, switching to a nature-themed serif designed for eco labels maintains the earthy tone while improving legibility at tiny sizes.
Which technical mistakes ruin the effect?
The most common error is horizontally stretching the font to fit a wide space. This flattens the organic curves and makes the letters look cheap. Adjust the tracking or rewrite the copy to fit the natural width instead. Another frequent issue is ignoring ink spread on porous materials, so always print a test patch on your actual stock before approving the final run.
Kerning also needs a manual pass. Hand-drawn styles often come with loose default spacing that works for large headlines but fails on smaller hang tags. Tighten the gaps between round and straight letter pairs, then step back and check the visual rhythm. If your main logo needs a stronger anchor, pairing this sketch style with a rustic camping typeface made for brand marks creates a balanced hierarchy that holds up across different merchandise.
What should I check before sending files to print?
- Verify stroke thickness matches your print method and material absorbency.
- Reset any horizontal scaling and adjust tracking instead.
- Manually kern tight letter pairs, especially around rounded characters.
- Print a 1:1 proof on the actual merchandise to check ink spread and readability.
- Confirm file outlines are expanded and embedded textures are high-resolution.
Run through these steps before exporting your final artwork. Adjust where the physical proof shows weakness, and your design will hold up on the trail and on the shelf.
Explore Design Top Earthy Typefaces for Outdoor Apparel Branding
 Most Authentic Wilderness-Inspired Font for Trail Maps
 Ecoserif: a Nature-Inspired Serif for Sustainable Labels
 Adventure Typography for Outdoor Apparel
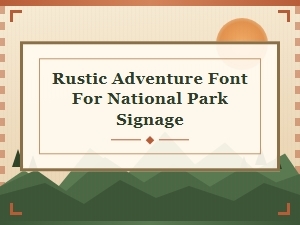 Rustic Adventure Font for National Park Signage